In this article, I would like to go through what are the different ways to set default schema in Postgres.
I came up with the thought of writing this article based on my recent experience in my work project which were thought of moving all our DDL and DML objects from the default (public) to new schema. Basically, its a matured projects and lot of schema references. Some of the database (DDL, DML) objects are referenced in the code base/DB scripts with fully qualified name and some of them don’t.
So, the challenge is how to change all the existing and new references to the new schema?
Ideally, we have thought to
Remove all the explicit schema references in the codebase.
Set the default schema to new schema at the user or database level.
Check the current/default schema
SHOW SEARCH_PATH;
Change the default Schema at Session Level
SET SEARCH_PATH=newschema;
Change the default schema at Database Level
ALTER DATABASE <db_name> SET search_path TO <schema_name>;
Change the default schema at User Level
ALTER ROLE|USER <role_name> SET search_path to <schema_name>;
This will ensure no more explicit schema reference as a future proof and for the new database (DDL, DML) objects we don’t need to explicitly specify the schema name. Because the schema set at the user level or database level will qualify all the database objects without schema name at the beginning.
But due to the Postgres running in the restricted environment, we don’t have enough privilege to set default schema at the user or database level.
So, How can we overcome this restriction? what would be alternative to set the default schema?
Finally, we have found a way to set default schema via connection string.
Basically we can set the default schema using SearchPath in the connection strings.
We can define connection string in different formats. There are few as below.
In C# 10, I have found these 5 features useful to write code prettier and faster.
Constant interpolated strings
String interpolation introduced in C# 6, it made our job easy by providing the simplified and convenient way to apply formatting in to a string.
An interpolated string is usually a combination of strings and an expression. On the run time, the expression is executed and the resultant string value will be added in the placeholder.
But there is a limitation, we cannot interpolate the constant string but it is allowed in C# 10.
Extended Property Patterns help us to improve the readability of code in accessing the child property from the parent property. Prior to C#10, child property were inaccessible at the same level as it involves nested level.
C# 8
{ParentProperty: { ChildProperty: Value}}
C# 10
{ParentProperty.ChildProperty: Value}
Global using
Global Using allows us to declare namespace/directive globally and it will available to all the files in the application. It helps us to declutter the code and keep it clean by prevent the duplication of declare same namespace in multiple classes/files. So we can put commonly used libraries and namespaces in one file and used across our project.
For example
global using system;
We don’t want to explicitly declare the above namespace in any file its needed and it can be declared in the common file.
File scoped namespace
File scoped namespace allows to declare a namespace for a entire file. After the namespace, we can declare and define the following types : Class, Struct, Delegate, Enum and Interface.
It limits to allow only one namespace per file. It is used to simplify the boilerplate code.
ASSIGNMENT and declaration in the same deconstruction
In earlier version of C#, it allows to assign value to existing variable or declare new variable in the deconstruction but we can’t do both at the same time . In C#10, this restriction has been overcome and we can declare both in the single deconstruction.
Before C# 10
// Declare new variable
(string name, string email) = var customer;

// Assign value to existing variable
string name;
string email;
(name, email) = customer;
In C# 10
// Allows both new variable declaration and assign to existing variable

string name;
(name, string email) = customer;
OTHER C#10 Improvements
Lambda Expression : Lambda expressions are more similar to methods and local functions. They can have a natural type and also apply attributes to lambda expressions.
var lambda = [DebuggerStepThrough]() => "Hello World";
Structure Type: struct types can have parameterless constructor and intialise the instance field or property at its declaration
public struct Customer
{
  // Parameterless constructor with property intialization
  public Customer()
  {
     Name = "Smith";
  }
  // Initialization of the property at its declaration
  public string Name { get; set; } = "Mike";
}
Null Checking: Simplifies the null check and throw error in a single liner.
In early version
string name;
if (name is null)
{
  throw new ArgumentNullException(nameof(name));
}
In C# 10
ArgumentNullException.ThrowIfNull(name);
There are lot more features released in C# 10 but found the above features to make our code more readable and productive.
In Part 1, We have gone through what is Kubernetes and its architecture.
In Part 2, We have gone through the key components such as Nodes, Namespaces and Pods.
In Part 3, we have gone through the components such as Service, Job and Ingress.
In Part 4, we have gone through the components such as ConfigMap , Secret ,Volume , Deployment and StatefulSet .
In Part 5, we have gone through the definition and configuration of Kubernetes resources.
In this part, let us delve in to how we can setup and Kubernetes cluster locally using Minikube and kubectl.
Install minikube AND KUBECTL
First, we need to ensure that Hypervisor ( VirtualBox, Hyper-V or KVM) is installed on the machine as it is required by Minikube to run the virtual machine.
Install minikube : Download and install the Minikube by following the instruction from this link .
Ensure the Minikube is installed by running the following command in your terminal.
minikube version
It should display installed version of minikube.
Install kubectl: Download and install the kubectl using this link which is a client tool to interact with Kubernetes Cluster.
Verify the installation using the following command and it returns the installed version.
kubectl --version
Start minikube cluster
Start the Kubernetes cluster locally using the following command.
minikube start
Minikube will start a Virtual Machine and setup Kubernetes Cluster inside it.
Once the cluster is up and running, we can verify using the following.
kubectl cluster-info
This will show the URL for accessing the Kubernetes Cluster.
Verify the Kubernetes nodes.
kubectl get nodes
We could see the single node (a minikube virtual machine) listed as ready .
DEPLOY A TEST application
To make sure, the setup is configured correct and let us verify by deploying a sample application. Let us create a simple YAML file as below.
It will scale up the deployment by running two instances of the application.
These are the basic kubectl commands that allow you to interact with your Kubernetes cluster. In the next post, we will explore additional advanced commands to manage and monitor our application effectively.
In Part 1, We have gone through what is Kubernetes and its architecture.
In Part 2, We have gone through the key components such as Nodes, Namespaces and Pods.
In Part 3, we have gone through the components such as Service, Job and Ingress.
In Part 4, we have gone through the components such as ConfigMap , Secret ,Volume , Deployment and StatefulSet .
In this part, let us delve into Kubernetes configuration. How we can create and configure Kubernetes Components using YAML files. Usually Kubernetes resources can be written in YAML format. So, let see how we can define and configure Pods, Services, Deployment, StatefulSet, ConfigMap and Secrets.
We can use the same example from the previous parts of this series and create it.
How to apply configuration to the Kubernetes?
kubectl apply -f <file_name>
file_name – Name of the configuration file.
The file will specify the desired state of the Kubernetes object. The Kubernetes will create or update the resources accordingly to match the specified state.
Note: In the part, I will explain about the kubectl CLI which is a client used to interact with Kubernetes cluster.
By separating out the configuration files like above, it would allow us to easily manage by version control and apply changes to our application consistently and reproducibly across different environments.
Hope it makes sense about create and define the manageable configuration files for Kubernetes components.
In the next part, let us walk through how to setup and access Kubernetes cluster locally.
In Part 1, We have gone through what is Kubernetes and its architecture.
In Part 2, We have gone through the key components such as Nodes, Namespaces and Pods.
In Part 3, we have gone through the components such as Service, Job and Ingress.
In this part, Lets talk through the components such ConfigMap , Secret and Volume which are used to store configurational data and sensitive information in an organised, secure and persistent way.
We will see each components with the examples that we used on the previous parts.
ConfigMAP
The ConfigMap is used to store configuration data (key-value pair) which can be accessed by the pods in the cluster. It provides separation of concern, as the configuration data will be stored in separation to pods. So, we could make changes to the configuration data without restarting the pods.
On top of the example that we used while going through the Pod and Service components, we have created ConfigMap: webapp-config component at the end.
In the data section of configMap : webapp-config, it contains two key-value pair for web application.
In the pod : webapp-with-db, we have defined the envFrom field and it contains reference to the configMap: webapp-config that we have mentioned before.
Now the pod can access the configuration : WEBAPP_ENV and DATABASE_URL to be used by the application.
Secret
The Secret is used to store sensitive information such as username, password, API Key or certificates which we can’t store it in the configMap. It is also store data in key-value pair. It will encode data in base64 format and mounted as files or environment variables in a pod.
We have added a new block for Secret: db-credentials .
In the block, we defined the data section that contain two sensitive data: username and password .
In the pod definition, we have added the environment variables and it referenced the secrets using secretKeyRef field.
In the secretKeyRef field, we specify the name : db-credentials of the secret and key is name of key specified in the data section of the Secret : db-credentials block.
VOLUME
The Volume is a directory used to store the data that can be accessible to all the containers. As it stores the data persistently in the separate storage from the pods, it will retain the data even though the pod/container is restarted or rescheduled.
Example
In this example, we will use the PersistentVolumeClaim (PVC) to dynamically provision a PersistentVolume (PV) and attach it to the database container.
Here we have created a block for a volume, PersistentVolumeClaim : database-pvc .
In the PersistentVolumeClaim , we specify the storage requirement with IGi storage volume.
In the pod definition, we created a volume : db-data and it should dynamically provisioned using the database-pvc PVC.
The database container is configured to mount this volume at /data/db. It ensures the data written inside the container will be saved in to the specified volume path (db-data).
With this setup, MongoDB data will stored in to db-data volume and backed up by dynamically provisioned PersistentVolume. So, the MongoDB data will be retained there even though the container will restarted or rescheduled on a different node.
Below, let us discuss about Deployment and StatefulSet as it ensures high availability, scalability and persistent storage. Both will be responsible for running the stateless and stateful applications.
Deployment
The deployment is a high level of abstraction in the Kubernetes and it manages the group of identical pods. It works well for stateless application when individual pods are interchangeable. It provides feature such as rolling updates, rollback, and scaling make fit well for Web Server, API and Mircoservices.
We have replaced Pod resource with Deployment type : webapp-deployment.
The replicas is set to 3, when the deployment is executed, it will create 3 instances of web application and database running inside the cluster.
The Deployment will ensure the availability of pods based on specified replicas by automatically creates a pod when the pod is failed or crashed. So, it facilitates high availability.
Statefulset
StatefulSet provides statefulness to the applications by providing each pod an unique identity, persistent storage and stable network identity. It works well for databases and key-value pair storage which requires persistent storage and ordered scaling.
In Part 1, We have gone through what is Kubernetes and its architecture.
In Part 2, We have gone some of the key components such as Nodes, Namespaces and Pods.
Now in this part, we will go through components such as Service, Job and Ingress.
Service
Service provides an abstraction to define a stable endpoint to access a group of pods. It allows us to expose application to other pods within the cluster or to external clients. It provides load balancing and auto scaling of pods behind them to ensure high availability.
Example
Lets have a look with the similar example that we used in the previous post.
Here, we added a new YAML block to define service : webapp-service .
The Selector field specifies which pod it targets toward. In this case, it points to the pod with label my-webapp .
The service exposes port 80 which matches the port expose by webapp container in the pod.
The targetPort specifies the port on the port that the service forwards traffic to. In this case, it matches the port specified on the containerPort of the webApp container.
Now we have a service: webapp-service that can be referenced/accessed by other pods within the classes using the name webapp-service .
Job
Job is an object that creates a set of pods and it wait for it to terminate. Once all the pods are terminated, then job will be marked as completes. All failed pods will be retried until certain specified number have exited successfully.
Job provides the mechanism to run ad-hoc tasks within the cluster. Most common use case is to create cronjobs that will automatically run a job at specified time at regular interval to support batch activities, backups and other application related scheduled tasks.
Example
Let us create a simple cronjob that run task every minute.
It run based on the schedule expression. Syntax is as below
In this case, it will run every minute.
It creates a container : hello. It pulls image from busybox:1.28.
It will print Hello from the Kubernetes Cluster inside the container pod at every minute.
Based on restartPolicy, it will restart job in case of any failure.
Ingress
Ingress provides a mechanism to expose our services to the external clients outside the cluster. On contrary to the Services provides internal communication between the pods within the cluster.
It acts as an external entry point to our application and it will manage load balancing and incoming traffic routing rules (HTTP routes). It is also support HTTPS traffic secured by TLS certificates.
In order to make Ingress work, we need to install an Ingress Controller deployed in our Kubernetes Cluster.
In Part 1, We have gone through what is Kubernetes and its architecture.
Now in this section, we will go through the key components of Kubernetes. I am going to breakdown the component explanation over few parts of this Kubernetes series in order to go in detail.
In this part, we will go through Nodes, Namespaces and Pods.
KEY components
Nodes
Nodes are the machines within the cluster and this is where the container will be deployed and run. The machine that mentioned here could be either physical or virtual machine. It responsibility is to provide enough resources to run workload on it. Nodes can be scaled up/down on demand.
Example
Let say, if we have Kubernetes cluster with three nodes A, B and C and it will host and run containerised applications.
Node
 - Node A
 - Node B
 - Node C
Namespaces
Namespace provides the logical grouping the resources within the Kubernetes Cluster. It is quite useful in categorise the resources they are related. For example, if we have a product that contain multiple applications (microservices) that can be grouped together within a same namespace. We can also create namespace divide resources between users and teams by applying role based access control.
Pods
Pods are the smallest deployable units in the Kubernetes. It represents one or more containers which share same namespace within the node. Each pod is a single instance of process within the cluster. It will be always scheduled on the same same node. It can be communicated with each other via localhost.
Example
In case, we have a web application and it can be deployed with application server and database. So, it will be deployed as a single pod. It can be scaled on demand.
Pods
 - Pod 1 (Web App + Database)
 - Pod 2 (Web App + Database)
Let us create a Kubernetes YAML configuration that deploys web application with application server (Nginx) and database (MongoDB) in to a pod.
Create two containers: One for application and another MongoDb.
First Container : webapp . It takes the latest image of nginx and runs on it.
Second Container: database. It takes the latest image of mongo and runs on it.
Both container will share the same network and can be communicate with each other via localhost.
Why do we need pod instead of container?
Grouping Containers: Pod provides the logical grouping of related containers. It simplifies the scheduling, scaling and managing of related containers.
Shared Resources: All the containers within the pod will share the same network namespace and volumes. It will be easier to share and communicate data.
Atomic Unit: The pod is a atomic unit of deployment. So, the scheduling, scaling etc can be done at pod level.
Scheduling: Kubernetes will do scheduling at pod level instead of container. So, all the containers with in the pod should co-exist on the same node.
So in summary, Pod will provide additional layer of abstract on top of related containers to facilitate and simplify sharing and resource sharing capabilities.
Hope, it makes sense about these components and in the next part we will go through other components such as Services, ConfigMap and Secrets.
I always have the thought of write the article on Kubernetes and finally it is going to happen now. I will try to breakdown the article in to multi part to avoid a long boring one article and segregate each specific topic in the Kubernetes.
So, in this part, I am going to cover What is Kubernetes and its architecture?
What is Kubernetes?
Kubernetes is an open source container orchestration tool and it is used to automatically deploy, scale and manage containerised applications.
WHY DO WE NEED KUBERNETES?
Kubernetes provides a robust and scalable platform to deploy, scale and manage containerised applications. It abstracts the underlying infrastructure and provides a consistent API for interacting with the cluster. So, it allows developers to focus on their application without worrying much about managing the underlying infrastructure.
For an instance, let say we have an .NET (or any other framework) application. We can package it into a container and run it on container contains a Docker engine or any other container engine. In this case, there is no complexity.
Basically, we pack our application in to a Docker image using Dockerfile and expose a port on a host for the external world to access it.
But there is a drawback on this approach, it incurs a single point of failure as it is running only one server.
To overcome this issue, we need an efficient mechanism that will handle single point of failure by auto scale application on-demand and withstand single-node failures. So, Kubernetes does the job for us.
Kubernetes helps in scaling applications, self-healing and rolling updates, make it well suited for running containers.
Main Use case
Let say, we have a massive application composed of microservices (API, UI, User Management, Credit Card transaction etc). All these microservice components communicate with each other using REST API or other protocols.
As the application has many components or microservices, we cannot deploy all the services in one container or server. The services have to decoupled and each service should be deployed and scaled on it own. This makes the application autonomous to develop and deploy easier and quicker.
But in this case, the complexity lies in networking, shared file system, load balancing and service discovery. This is where Kubernetes comes in to play. It helps in orchestrating complex processes in a manageable way.
So, in a nutshell, Kubernetes with take care of massive overloads such as networking, load balancing, service discovery, disaster recovery, resource scheduling, scalability and high availability.
KUBERNETES ARCHITECTURE
Let’s understand the architecture of Kubernetes based on the following illustration.
Master Node
Master Node acts as a heart of the Kubernetes Cluster. It’s a control plane for the entire cluster. It is responsible for managing the overall status of the cluster and also scheduling new pods, monitor the health of nodes and pods and scale pods on demand.
Let’s look in to the Key Components
API Server
API Server is a central access point of the cluster. It provides the REST API to perform create, update, delete resource operation. So, the client such as kubectl or any UI will interact with it. It is the only component interacts directly with etcd , whereas other components interact via API provided by it.
Controller Manager
Controller Manager will be responsible for monitoring the state of the cluster through the API Server and take necessary actions to ensure the desired state is maintained. For an instance, ReplicataSet Controller is ensure the application is running with expected no. of pods.
etcd
etcd is a distributed key-value pair store contains the configurational data of the cluster. i.e. it stores the persistent data of Kubernetes object such as pods, replication controllers, secrets and services.
Scheduler
The Scheduler is responsible for assigning a new pod to nodes based resource requirement and availability. It is also ensure the workload is distributed evenly across the Worker Nodes .
Worker Nodes
Worker Nodes act as a data plane of the cluster and executes the actual workload. Basically, they are machines where containers (pods) are scheduled and executed.
Each worker node runs several key components.
Kubelet
Kubelet is a worker agent runs on each node and communicates with the master node. It ensure the containers in the specified pods runs healthy.
Container Runtime
Kubernetes can contain multiple container runtimes such as Docker or Containerd . It is responsible from retrieve the docker image from the repository and run containers on the worker nodes.
Kube Proxy
Kube Proxy acts as a service proxy and runs on each worker node. It is responsible for communication between pods/containers/nodes. It ensures the entire network configuration is up to date by listening to API Server on any changes on services/pods.
How do they interact?
The master node and worker nodes communicates with each other via API Server. Also, the user (client) and other components communicate via API Server.
For an instance, if a new application is deployed to Kubernetes, its configuration will be sent to API Server and stored in etcd. The Controller Manager constantly monitors the cluster state via API Server and if there is any deviation from desired start and it will take corrective action to ensure the expected state is maintained by reconcile it.
When the new pod is expected to be scheduled, then Scheduler comes in to play by choosing the appropriate worker node based on the resource availability and other constraints. Then the API Server will inform the chosen worker node. The container runtime such as Docker or Containerd will pull application image from the repo and the Kubelet will kick start the container.
Then the worker nodes will report the status of the pods to master nodes on a regular basis. So, that master node will keep track of the current state of the pods on each worker node.
Hope this gives an idea on what is Kubernetes, why do we need it and architecture. In the next post, we will go through the main components of Kubernetes.
In the Part 1, We have gone through how to extract and manipulate JSON string in SQL. In this article, let us see how to format the query result as JSON.
FOR JSON
Used to export SQL table data in JSON format. It take column or alias as a key. It is similar to FOR XML in SQL Server.
AUTO – It will create nested JSON sub-array based on the table hierarchy used in the query. It is most commonly used.
PATH – It defines the required JSON structure using the column name or alias. It is used to control how JSON data is generated or nested.
SELECT <COL_NAME> ..
FROM <TABLE>
FOR JSON AUTO| PATH
Let us create a table with some data to see how this FOR JSON function works.
GO
INSERT [dbo].[Addresses] ([Id], [CustomerId], [Address], [City], [Country]) VALUES (1, 1, N'XXXX', N'Oxford', N'UK')
GO
INSERT [dbo].[Addresses] ([Id], [CustomerId], [Address], [City], [Country]) VALUES (2, 1, N'YYYY', N'London', N'UK')
GO
INSERT [dbo].[Addresses] ([Id], [CustomerId], [Address], [City], [Country]) VALUES (3, 2, N'ZZZZ', N'Birmingham', N'UK')
GO
INSERT [dbo].[Addresses] ([Id], [CustomerId], [Address], [City], [Country]) VALUES (4, 2, N'XYXY', N'Chennai', N'India')
GO
SET IDENTITY_INSERT [dbo].[Addresses] OFF
GO
SET IDENTITY_INSERT [dbo].[Customer] ON
GO
INSERT [dbo].[Customer] ([Id], [Code], [FirstName], [LastName]) VALUES (1, N'ABCD', N'Kumar', N'Thamilarasan')
GO
INSERT [dbo].[Customer] ([Id], [Code], [FirstName], [LastName]) VALUES (2, N'XYZ', N'Cholan', N'Kumaran')
GO
SET IDENTITY_INSERT [dbo].[Customer] OFF
GO
ALTER TABLE [dbo].[Addresses] WITH CHECK ADD CONSTRAINT [FK_Addresses_Customer] FOREIGN KEY([CustomerId])
REFERENCES [dbo].[Customer] ([Id])
GO
ALTER TABLE [dbo].[Addresses] CHECK CONSTRAINT [FK_Addresses_Customer]
Go
Let use JSON AUTO to display data in JSON format.
SELECT * FROM [dbo].[Customer] c

INNER JOIN [dbo].[Addresses] Addresses ON c.Id = Addresses.CustomerId

WHERE c.Id = 1

FOR JSON AUTO
It will return result as below.
Let’s try with JSON PATH.
SELECT Id, Code, FirstName, LastName,
    (SELECT Id, Address, City, Country
    FROM [dbo].[Addresses] a
    WHERE a.CustomerId = c.Id
    FOR JSON AUTO
    ) as Addresses
FROM [dbo].[Customer] c
WHERE c.Id =1
FOR JSON PATH, ROOT ('Customer');
OPENJSON
A table value function will generate a relational table with its content from the JSON string.
Basically, it will iterate through the JSON object and arrays and generate a row for each element. We can define and generate a table with and without predefined schema.
SELECT
FirstName, LastName, Address, City, Country
FROM OPENJSON(@JSONData)
WITH (FirstName VARCHAR(50),
LastName VARCHAR(50),
Code VARCHAR(50),
Addresses NVARCHAR(max) as json
) as B
cross apply openjson (B.Addresses)
with
(
Address VARCHAR(50),
City VARCHAR(50),
Country VARCHAR(50)
);
We can also access child JSON objects using OPENJSON by using CROSS APPLY function. If the column specified with AS JSON , then the type must be NVARCHAR(MAX). Without this option, it will return NULL or if we specify strict option, it will throw an error.
Hope this gives some idea on how to format the query result in JSON.
As we might know, JSON (JavaScript Object Notation) is a simple and lightweight key-value pair message exchanging format. Its a very popular format and used in most modern services. SQL Server is also support to work with JSON format.
So, in this article , let us see how to deal with JSON data in SQL Server.
SQL Server provides the capabilities to provide built-in JSON support.
So, in this part, let us see how to extract JSON data and use them in queries.
The following built-in functions help us to achieve parse and manipulate the JSON Data
ISJSON
Checks whether the string contains data in a valid JSON format.
Basically, it returns in int data type. It returns either 0 or 1.
If there is a duplicate property at the same level on the JSON data, both JSON_Value and JSON_Query always returns the first one.
For example
DECLARE @JSONData AS NVARCHAR(4000);

SET @JSONData = N'{

    "Customer":{

        "FirstName":"Kumar",

        "LastName":"Thamilarasan",

        "FirstName":"Kumaraguru",

        "Code":"CCEEDD

    }

}'
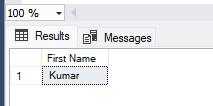
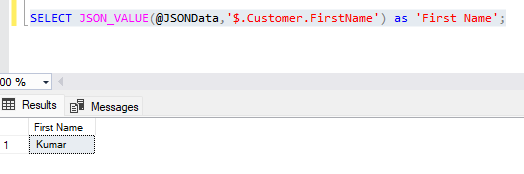
SELECT JSON_VALUE(@JSONData,'$.Customer.FirstName') as 'First Name';
Now, let us see how we can extract JSON string and manipulate it.
JSON_MODIFY
It returns an updated JSON string in NVARCHAR type.
JSON_MODIFY(<json_string>, <path>, <new_value>)
<json_string> – Name of the variable or a table column.
<path> – Path of field in a JSON string.
<new_value> – Insert/updates with a new value in the specified path.
Updates an existing value
Let us replace the first name of the customer.
SET @JSONData = JSON_MODIFY(@JSONData,'$.Customer.Addresses[0].Address', 'Updated XXXX');
Insert a new value
In the JSON string, if the path is exist, then it will update the attribute specified in the path. If the attribute is not exist, it will insert the new attribute at the end of the string.
In the example, We will insert the new field called MiddleName .
SET @JSONData = JSON_MODIFY(@JSONData,'$.Customer.MiddleName', 'G');
Append a value
In the JSON string, we can append to the existing field using append . In an array field, it will append an item to the end of array items.
SET @JSONData = JSON_MODIFY(@JSONData,'append $.Customer.Addresses', JSON_QUERY('{"Address":"ZZZZ", "City":"Birmingham", "Country":"UK"}','$'));
Update multiple fields
In the JSON string, we can also update multiple fields at once.
For example
Let us modify FirstName and LastName fields.
SET @JSONData = JSON_MODIFY(JSON_MODIFY(@JSONData,'$.Customer.FirstName', 'Cholan'),'$.Customer.LastName','Kumaran');
Delete existing field
In the JSON string, specify the field value to NULL to remove it.
For example
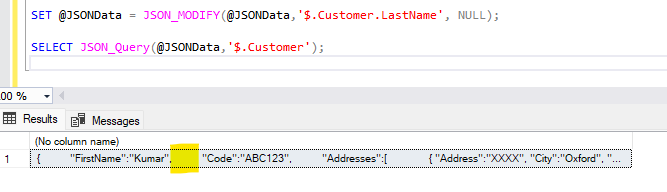
Let us remove the LastName field.
SET @JSONData = JSON_MODIFY(@JSONData,'$.Customer.LastName', NULL);
Rename a field
In the JSON string, rename a field.
For example, let rename the FirstName field to ForeName.
SET @JSONData = JSON_MODIFY(JSON_MODIFY(@JSONData,'$.Customer.ForeName',
   JSON_VALUE(@JSONData,'$.Customer.FirstName')),'$.Customer.FirstName', NULL);
Hope, it makes sense on how to extract and manipulate the JSON string.